
I have created a video walkthrough for the level but I also have a picture walkthrough located below with more information about each section. It would be appropriate to read the Challenge post beforehand to better understand the intent of the level.
1. The player starts out next to the vehicle- the block to the right- after it has been stopped by the grappling hooks. At this point most of the Locust soldiers outside have been killed so there is no opposition at the moment.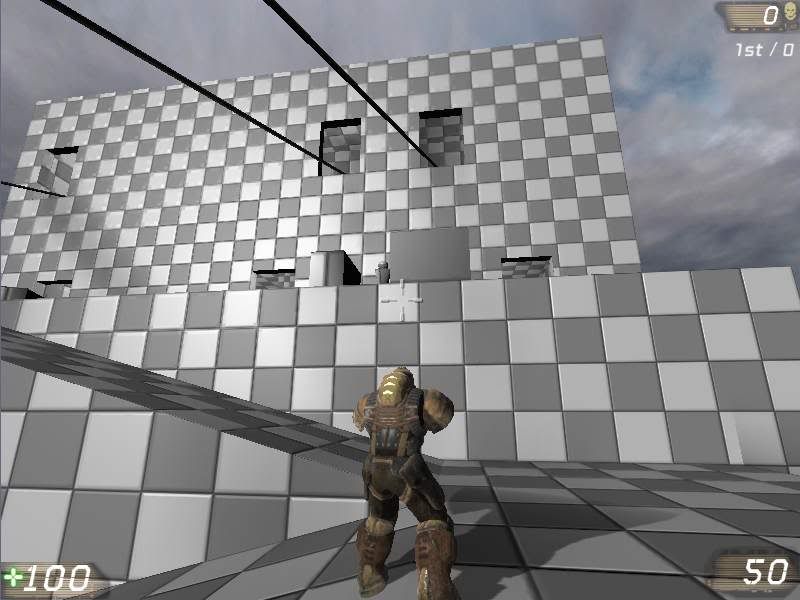
2. Ascending the ramp the player will see the first enemy which they can choose do engage right away, but there is little cover at this spot and the enemy has the high ground.
3. Now with some cover the player can fight the enemy more effectively, but there are now more options available. There are three doors that lead into the main building with the most obvious choice being the one to the near left.
4. Walking into the first door reveals enemies further in the room, but not much cover between. The player could still navigate forward, but would likely have to proceed cautiously.
5. If the player chooses to move to the third door from the outside they will enter the room in a flanking position. The player could also see this strategy after entering the first or second door and circle around to get to this spot.
6. During or after the fight the player would notice the turret that fired an electrified grappling hook inside the room. To get past the player needs to first shoot the turret so that the power to the wire is interrupted, and then cut the wire with their chainsaw. If this is not understood within a short time, one of the characters would hint at the solution so that the player is not stuck too long.
7. The player enters the next room to notice two elevated platforms with cover. In co-op it may be advantageous to have one player get onto the platform and the other stay below to attack from different angles.
8. Vaulting onto the raised platform allows the player a better view of the room, but has limited mobility. The player would not have a good shot at disabling the turret from this location, but they could jump down on either side of the wire.
9. On the ground level the player has to contend with a grappling hooks dividing the room. From this vantage point the player is able to shoot the turret and cut the wire in relative safety, but only needs to do so if they want the extra room to maneuver.
10. After clearing out the room the player then moves into a narrow hallway with two Locust at the opposite end. This would be a quick battle, but if the player looks behind the cover where the enemy was positioned they would see a weapon and ammo pickups.
11. The next large room features a staircase that wraps around the perimeter with slanted supports in the center to provide extra cover.
12. Climbing up the slope the player encounters an enemy up ahead, but also starts to get fire from enemies above. The player can use the railing as cover and shoot the turret in the corner of the room.
13. Disrupting the turret will cause the electricity in the wire to turn on and off, but if the player does not clear out all of the enemies in the room it will be difficult to cut while engaged in combat. The wire has enough clearance that the player can dive or run under it safely.
14. The next small encounter has two enemies on the other side of a wide barrier. The player can attempt to move around and flank, but may be confronted by the enemy before springing the trap. Simply sticking out of cover is also more dangerous because of the close proximity, but the enemy could also be taken down just as quickly.
15. Another minor battle, but the player has options of which side to move forward or to just stay at a distance to fight. While Gears of War typically has a flood of enemies enter into an area and the player moves on when it is cleared out, this series of rooms is meant to be one flowing encounter. Since there are only a few enemies these skirmishes would operate as a "calm" moment.
16. This setup provides the last major battle in this scenario. On opposite ends of the room are raised turret platforms and in the center is an octagonal section with two levels. The player could fight some of the enemies from this position but would have to move closer to clear out the distant enemies. Disrupting the turret would not do much yet as the player cannot cut the wire from here.
17. Getting onto to octagonal centerpiece provides a location to fight the enemies from an even level and room to move around. Retreat would be slightly more difficult as the player would have to jump down from the ledge before they could run away.
18. Nearing the end the player faces three doors with a single enemy guarding them. The player can deal with the enemy now or wait until later since it is not an immediate threat.
19. The first room has a grappling hook turret that can be shot and the wire cut.
20. There is some resistance in the next room with an enemy guarding the turret, but the player should be able to easily clear the room and cut the wire.
21. The last enemy and wire to be cut down are in the room, and the player would be shown a short cinematic with Marcus telling the rest of the squad they are ready to head out. With the building all cleared of enemies it would be annoying to have to re-traverse the rooms to get back out, so the camera would just fade to the squad regrouped in the vehicle. The player would then start back into the driving level and finish off the remainder of the journey up the mountain.
5.24.2009
Walkthrough (Gears 2)
![]()
Subscribe to:
Post Comments (Atom)


No comments:
Post a Comment